SliQ Invoicing Online allows you enter all the information for an invoice on a single page. You can add a new customer, add line items, preview, save and email all from a single page.
There are a number of ways of raising an invoice, e.g. you can click the Raise an Invoice button on the dashboard or select New Invoice from the drop down menu as shown here:
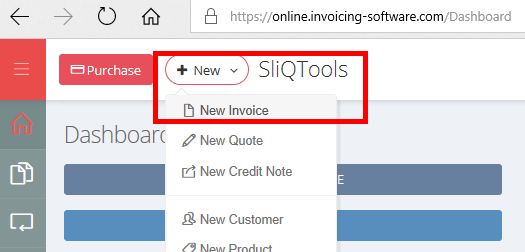
After clicking the menu option, the Edit Invoice screen will be shown. Your new invoice will already have been assigned the next invoice number.
Adding a Customer
To specify the customer for the invoice, simply enter the customer name into the Customer Name field. You can then enter the invoice address, i.e. the customer address and if needed a delivery address.

Note: If you have already raised invoices, as you type the customer name, SliQ will present a list of matching customers for you to select from. If you prefer you can also choose the Add or Pick buttons next to the Customer Name field to either add a new customer or search from and select an existing customer for the invoice.
If you use the Add button to add a customer you can enter the contact details for the customer including their email address. However, if you simply type the customer name into the invoice and save, when you email the invoice, SliQ will prompt you for the customer contact details before sending the email.
Adding Line Items
You can enter line items by entering a description, quantity and price into the line item fields:

The Item field is not shown on your printed/ emailed invoices by default. If you have already saved products or discounts into SliQ, typing the name into the Item field will make SliQ show you a list of matching items for you to select from in order to fill in the line item fields.
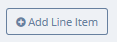
You can add as many line items as you like to an invoice by pressing the Add Line Item button:
Line Item Functions
By clicking the drop down button at the left of a line item you can access further options for line items:
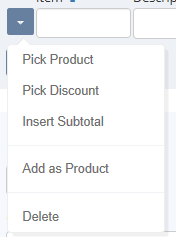
Pick Product/ Pick Discount let you search for products and discounts you have already entered into SliQ’s database.
Add as Product lets you add the line item as a product into SliQ’s database for easy selection when raising new invoices and adding line items.
Insert Subtotal lets you turn the line item into a subtotal line. This will then show the total of all previous line items. By inserting a discount on the line item following a subtotal you can give a customer a discount, e.g. 10% on a group of line items.
Entering a %age as a Price on a Line Item
When entering a price for a line item you can optionally enter a percentage. The percentage will be calculated as a percentage of the previous line item price. For example you might enter a price of -10% giving a 10% discount on the previous line item.
Ignore Fields You Don’t Need
The invoice editor includes fields you may not have a value for, e.g. an order number or a quote number. You can also add attachments and specify carriage/ delivery costs. Ignore these fields and leave them blank if you don’t need them.
Saving the Invoice
When you have entered all the information you need, press the Save Invoice button at the top of the invoice. SliQ will then save the invoice and show you more options including buttons to email and print the invoice.
What is a Draft Invoice?
When entering a new invoice you can opt to save the invoice as a draft. Draft invoices are not visible to your customers in the online client portal. You can continue to edit a draft invoice at a later and when you are ready save the invoice as non-draft by pressing the Save Invoice button at the top of the edit screen. You can them email the invoice to your customer and your customer can see the invoice in their client portal.